How to Install and Setup Yoast SEO Plugin
Hey guys, it’s Anthony here and as Brittany said– there will be a new blogging tips post every week and I’ll be guest posting whenever there is a technical website or photography topic scheduled.
Each month will carry a certain theme that we can really focus in on and this month is all about… *drumroll please*
How to Improve Your Blog’s SEO
SEO can get really confusing, it took me a few years to comprehend the in’s and out’s myself. At the start of Brittany’s blog, she had absolutely no understanding about the necessities surrounding SEO but after she started using the concepts daily in her posts and reading up on it more… now I can discuss it with her no problem (she actually thinks it’s fun to analyze).
So I’m going to teach this by assuming you have ZERO knowledge about the subject and that you also have some sort of blog you’re looking to improve within search engine rankings. I’m not going to get too in-depth and ramble off a bunch of useless information as if you’re taking a college course.
I’m going to tell you exactly what you need to do, how to do it and why it is important.
First things first
In the beginning of December, I wrote a post explaining SEO basics for bloggers. I would highly suggest reading that first before continuing. I outline basic SEO terms, give a brief description of how Google works, etc. I will reiterate key important concepts throughout this month’s posts, but each of these posts will build on another so it just makes sense to read them in order.
Installing Yoast SEO
What is Yoast SEO?
Only one of the best SEO plugins for WordPress- I can’t recommend it enough. It’s actually called WordPress SEO by Yoast, but most likely you’ll hear people refer to it as Yoast or Yoast SEO.
Unfortunately if you are on WordPress.com, you wont be able to install this plugin. You will need a self-hosted website to be able to install ANY plugin (aka WordPress.org). Here I list the benefits between having WordPress.org over WordPress.com.
Installation
You will install Yoast the same way you install any other plugin within WordPress.
Go to Plugins > Add New, then search for WordPress SEO. It should be the first one that pops up under Yoast SEO.
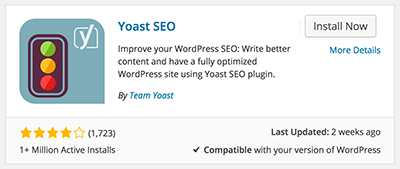
Click “Install Now” then activate once the installation is complete.
How to Setup
This will take a little more work but like I said earlier, I’m not going to bombard you with a bunch of information. This is the exact same setup we have on brittanyxavier.com.
Titles & Metas
If you look to the left, you will now see the tab SEO.
Hover over it with your mouse and then click Titles & Metas. You will notice tabs at the top, make sure you are in the General tab.
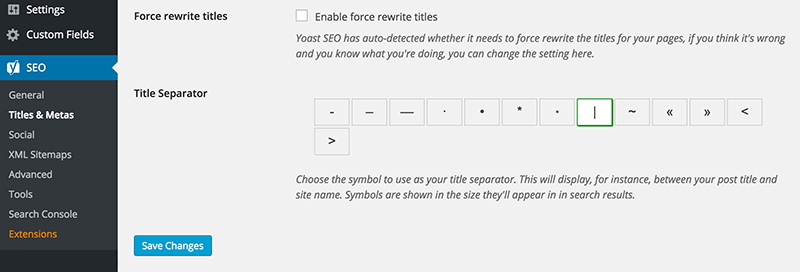
Like I mentioned in my previous post, Metadata is the text you see within Google’s search results, but not necessarily within your own blog post. The Title Separator we went with was “|”. Honestly, I just think it looks cleaner than the other options and there is no proof at all one symbol helps SEO better than the other. So really it is up to you which one you choose.
Don’t forget to hit Save and let’s move onto the Homepage tab.
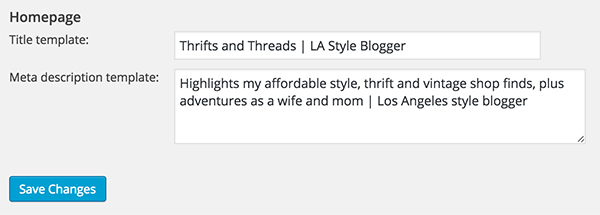
Make sure your keyword is used within the page title and description because this is how Google will see it and how your audience will find you (well one way).
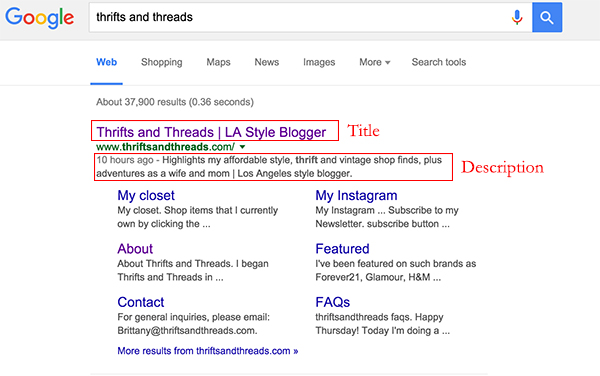
That’s it for Titles & Metas. The other tabs have data already entered, so there is no need to alter (I’ll expand more on best practices for Title and Meta text in next week’s post as well).
Social
Under SEO, click Social then enter in your information. This is to let Google know which social profiles connect with your blog.
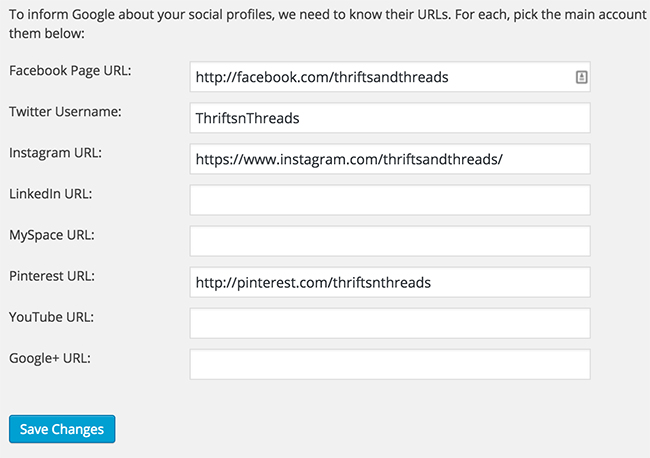
You will also notice individual tabs at the top for Facebook, Twitter, Pinterest and Google+. The only settings I changed was for Facebook.
Facebook: Check Add Open Graph meta data. This will give you the ability to define your own title, meta description and image for Facebook in the WordPress editor, plus allow you to import a photo that is best optimized for Facebook’s dimensions (which we will go over next week). Also, if you have a Facebook fan page, you can add your admin here to get insights into how much traffic is coming from your Facebook page to your blog.
Conclusion
That is it, the other sections you don’t need to worry about as the settings are already configured.
Told you I wasn’t going to give you information overload! But seriously, if you have any questions about the other sections I didn’t cover or certain options within the plugin, please feel free to ask them in the comments below.
Next week I will go over on how to utilize Yoast SEO within your individual blog posts. Yoast provide’s some cool tools on how to optimize your blog post through keyword research, page analysis and content creation.
Have a great week!
