How to Create Instagram Content
Last week I discussed How to Grow your Instagram Following and this week I’m following up with my answer to the most frequently asked question via your e-mails…
How do you create content that works?
First, let’s again review why we want to create good content in the first place: to grow your Instagram following, which opens the door for brand sponsorships and drives traffic to your blog.
I will cover blog photography tips in an upcoming post but today I’m going to focus more on the in-between photos, your daily life between blog photo promotion on your Instagram. Most of the successful style bloggers have one major thing in common on their Instagram feeds: a healthy mix of professional looking blog photos as well as the daily life shots of what they’re doing in between.
Let me go over a few tips that I’ve learned that should help you figure out what type of “in-between” photos to create. But first, here are a few things to keep in mind:
Lighting
Always take photos in natural light as much as possible. The flash is good for the moments you want to capture maybe at an evening event or for a candle-lit dinner, but for the most part natural light looks better- especially with detail photos. This can be achieved by shooting a photo by a window, or taking your blog photos early morning or towards the evening (sunrise or sunset)- when the light is not as harsh but still has a great natural glow. Also avoid taking photos indoors at night with indoor lighting (depending on the type of light bulb, it can create either a yellow or blue tint and also have weird glares/shadows).
Cropping
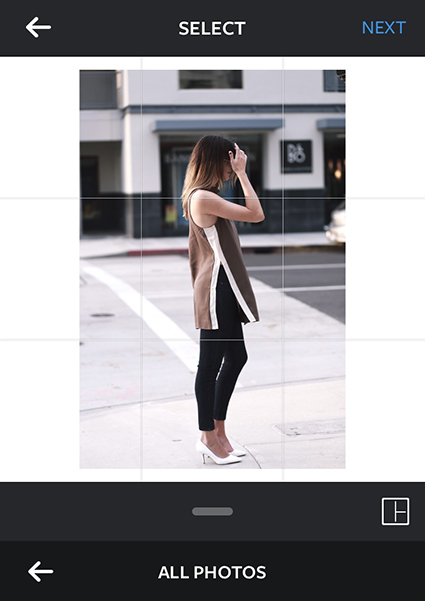 Shoot your Instagram photos in “Square” or learn the dimensions. In camera mode on the iPhone, you can change your picture settings from “Photo” to “Square” by swiping to the right. Almost all my photos I shoot are in the Square setting to make sure I’m not cropping anything necessary out. This also helps with full body outfit photos because it allows the person taking the photo to scoot far enough back to make sure your full outfit is in frame. This is especially important if you are submitting photos to featured pages- if they are asking for full-body photos make sure to only submit a photo that is Instagram’s size frame but with your whole outfit pictured.
Example:
OOTDMagazine requests that you submit images at a minimal 900 x 900 pixels, essentially meaning a square. Your iPhone, set in square mode, has a default 2448 × 2448 pixels…so you’ll be fine.
Same is true for Wearit. Loveit’s requirements.
Note: OOTDMagazine and Wearit. Loveit. only feature full body pictures that cover the whole square, nothing cropped with borders.
Now, if you like to use the white border around your photo that fits it into the size of Instagram’s dimensions, then Square would not be as beneficial to you because you are able to fit any size photo into the frame. For example, to the right is a photo that I used for my blog but didn’t post to Instagram because it didn’t fit the square dimensions. However, with using an app called Instasize I was able to give it the white border that made it fit to Instagram’s square dimensions.
It’s really just preference what you like better, but you can tell from my own feed that I prefer a full frame photo and I make sure to shoot a few blog photos that fit to Instagram’s dimensions so I don’t have to crop.
Keep Collages to a Minimal
Try not to use inspirational celebrity or street style photos/collages very often, that’s great from time to time but when people visit your Instagram feed for the first time, you want them to know it’s an actual person, not just another inspo account. You want to connect with your audience and reinforce your brand…YOU! You’re only given a small space to work with, try to keep it as simple and clean as possible. If the split look of a blog post isn’t working for you, try doing a full look and not doing the split picture or vice versa. Especially when you are starting out, feel free to change up your feed to find out what works best.
Now that I covered a few overall tips, the following is more content type specific:
Horizon
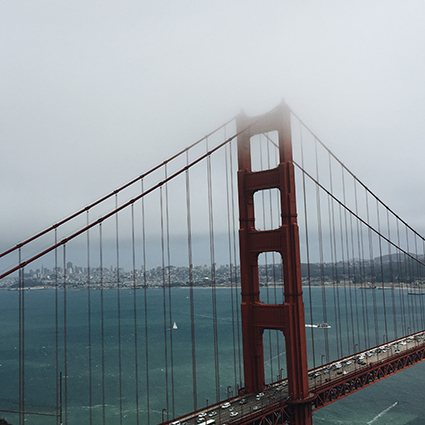
Before (left): This was a photo I took during our visit to San Francisco, but I wasn’t too thrilled about just a portion of the bridge, it didn’t seem display well what the bridge looked like overall.
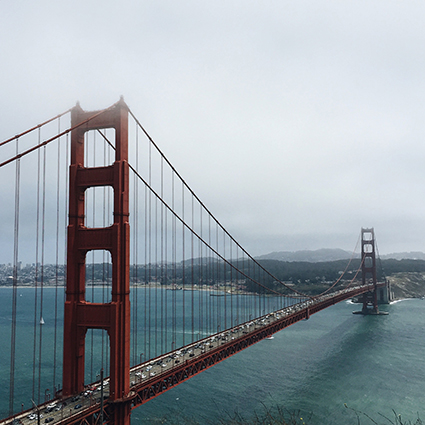
After (right): I made sure to capture more of what I was seeing at that moment and used “Straighten” to get the line of the bridge straight.
Focus on the big picture when taking a horizon or interior decor photo, try to really capture the full feel of your view as much as possible and allow your followers to get an accurate vibe of what you were experiencing that moment… aka life through your eyes.
Food Angles
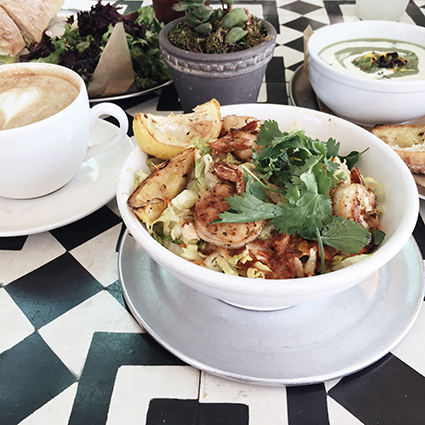
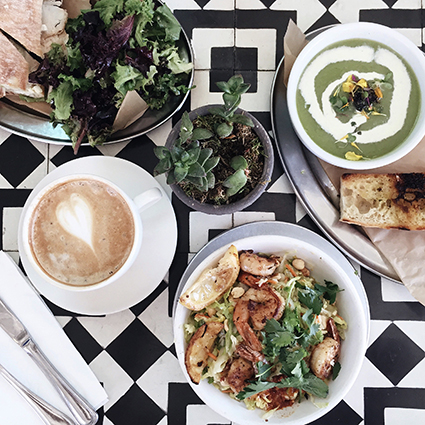
Before (left): This only captured a piece of what our meal looked like, and seemed to be focused more on the white plate than anything.
After (right): I stood up to get a bird’s eye view and my angle also helped capture more of the table, rather than what was directly in front of me.
Always try out different angles with food photos, from overhead or side to side…..and sometimes from below (like under the table..just kidding, don’t be a freak about it). It’s always fun and interesting to see how some photos turn out just by altering the angle.
Sidenote: If you post a food photo, use the Location Check-in to show where it’s at… be a resource to your followers, you will find some will be following you specifically for restaurant locations or places to explore. I’ve actually had several of my husband’s friends mention that they follow me because they want restaurant ideas- which works because they most likely wouldn’t be following me if I only posted 100% outfit photos. Figure out how can you be a resource to followers via your Instagram content.
Background Detail Shots
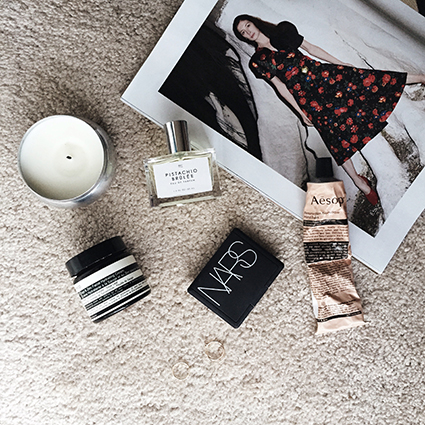

Before (left): The jewelry clashes with the carpet and gets lost within the photo. Choose backgrounds that make sense for what you want to display (i.e. makeup on a bedroom floor? No).
After (right): I switched up the background to my marble table which kept the coloring more white and allowed the jewelry to pop.
Make sure the pieces you want to display aren’t getting lost in the background. If so, try a new surface without clutter (i.e. light hardwood floors, a white tabletop, wooden desk, pretty tile, etc.)
Background Outfit Shots
Same idea for outfit photos, be aware of what you are wearing to make sure your outfit isn’t getting lost in the background. For example, if you’re wearing a super busy printed dress- then aim for a neutral background.
Here’s a few examples of where I found a background that worked for the black and white vibe I wanted. You can see on my Instagram feed I often stand in front of walls or I find a clean sidewalk:
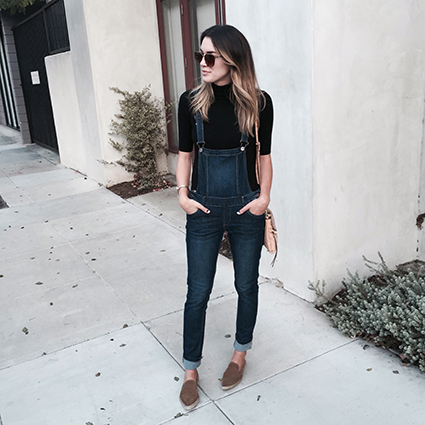
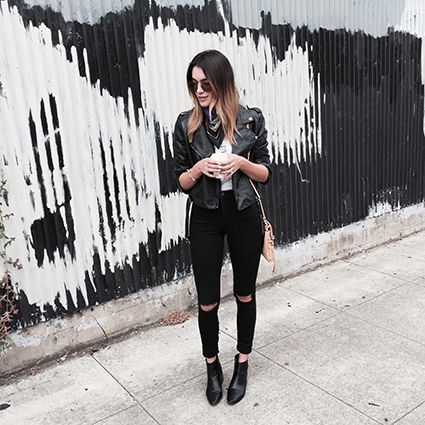
I never have to go too out of my way to find a background when I’m out and about in the city and want to take a candid photo of my daily outfit, usually there is some wall or cute corner that works. However, if you don’t live in a city environment and feel like finding something clean is a little more difficult- then you may have to do a little more scouting but once you find something that works, don’t be afraid to continue using the same one (i.e. behind a store building, in front of a garage door, etc.)
Have fun with your Instagram feed and don’t feel like every photo needs to be perfect, but hopefully these techniques will help you with ideas for your “in-between blog post” content going forward!
Feel free to leave any questions below!
xx Brittany
